10.
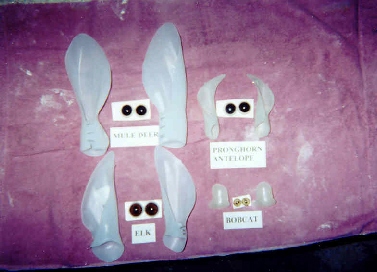
Next we will turn our attention to the EARS. Here we have tried to show you 4 different earliner and glass eys sets. Our labeling may be hard to read but upper left is Mule Deer; upper right is Pronghorn Antelope; lower left is Elk; lower right is Bobcat. Ears of animals have a pocket - two pieces of skin where something can be inserted in like your hand in a glove. Remember at the first of this link we turned the ears inside-out so that both skins could be exposed to the tanning solution and be preserved. The earliners we use are a solid, bendable but durable plastic.
(Above Picture)
11.
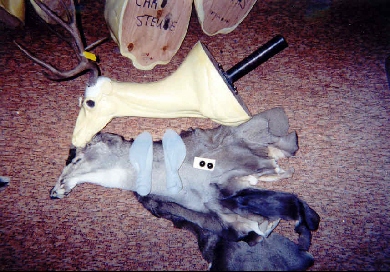
Here we have a Form, Tanned Cape, Earliners and glass eyes all matched for size and this deer has all the supplies and is ready to mount; except for a little cape thread and some clay. The black pipe on the baseboard of the form is for attaching to a mounting stand - remember those earlier? So we don't get customers antlers mixed up which makes for unhappy customers we attach a yellow number tag on each pair of antlers; corresponding unnoticalbe small holes are punched in the cape to match the correct cape with the correct form. The holes punched in the tanned cape is done with a 3 cornered punch.
(Above Picture)
14.
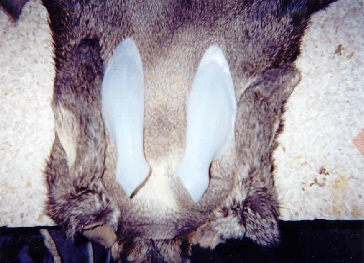
We have soaked our cape in water overnight and now we are ready to insert the liners into the ear pockets, with both ears turned right side out. This picture really isn't a good example because the right ear was damaged in life by the deer and it grew in an unnatural direction. It should be pointed like the left ear; some ear liner cutting alternation will have to be done before inserting the liner on the right ear. We put the earlines next to the actual cape to show you the overall size is correct.
(Above Picture)
12.
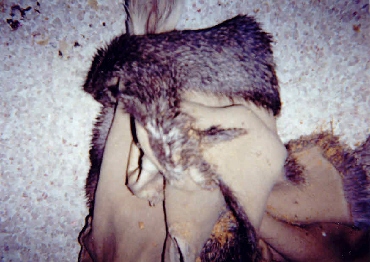
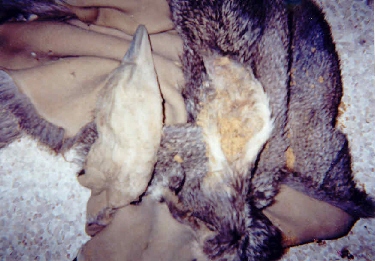
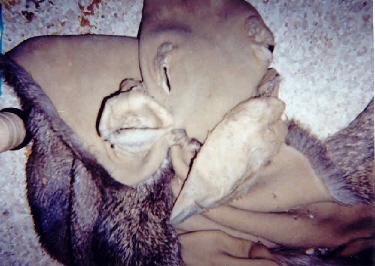
We start by pushing the tip of the inside-out ear down into the ear itself and inverting until we can grab the tip of the ear from the hair side and then pull it through right side out. The tannery put sawdust inside the ear I think to soak up unwanted tanning solution that would be almost impossible to extract from that ear pocket. It might also have something to do with the throughness of the tan in preventing the hair from slipping/rotting; the tannery is very secretative about their techniques and procedures. The sawdust easily brushes out.
(Above 2 Pictures)
13.
This shows one ear turned ready for mounting and one yet to be turned. Again the sawdust is just brushed out.
(Above Picture)
9.
Their are again different techniques with different taxidermists - we trim all the excess internal nostril skin off to the HAIR LINE of where the nostril meets with the nose. AGAIN as instructed in #8 to the left; DO NOT CUT any further in from the internal nostril skin past the hair line. (where the hair starts to appear on the nose)
(Above Picture)
8.
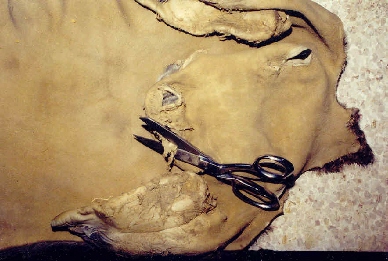
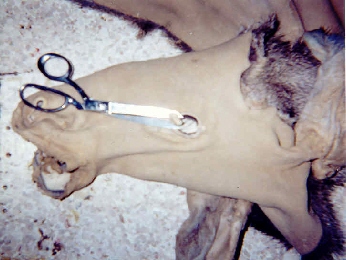
Their is quite a bit of trimming of extra flesh that needs to come off where the tannery has thinned the fleshy area around the eyelids. This has to be trimmed as thin as we can get it WITHOUT cutting the eyelid itself. If you cut the eyelid it is very difficult to repair, so it wouldn't be noticeable to the customer - just don't cut the eyelid. We trim off all the extra tanned skin around the eyelid with sharp cloth scissors.
WE WILL NOW GO OFF OUR DETOUR OF OPEN MOUTH MOUNTS - AND CONTINUE WITH WORK THAT HAS TO BE DONE FOR EITHER OPEN OR CLOSED MOUTH MOUNTS.
Click Antelope for Next Page-->
13.
This step is time consuming and very tedious. Now that we have that gap filled between the jaws themselves and the skin gum line we need to BLEND IN THE BLACK GUM LINE INTO THE FLESH AREA OF THE MOUTH TO THE JAWS. This is done with an airbrush so we can get the gentle/gradual color blending from the gum line to the jaws. The Question is: "What color(s) should we use to achomplish this job?" HUNTERS NEED TO UNDERSTAND THIS ONE FACT... In the wild their will never be two elk mouths the SAME SHADE OF COLOR. Variations of these colors vary do to... 1. Genetics 2. Diet/Health 3. Has elk been bugling or running making blood flow more or less prominate in the mouth. 4. What part of the country to they live in. Thanks to one master taxidermist I am in contact with their is a.... "General Painting Schedule" that he uses and I have been privileged to obtain. We paint the open mouth Elk, Deer, etc. with these general painting schudules hoping to get as close as we can to what nature has generally made. Depending upon the customers pickyness we do our best.
(Above Picture)
PICTURE OF
OPEN MOUTH
ELK AIR PAINTING IN THE LIP GAP.
(Picture to come yet)
11.
IF we have an OPEN MOUTH MOUNT remember we trimmed the lips earlier? We will now take the lips and pin them to the lip border on the mannikin until the skin is dry and then when the skin dries it will skrink a little and lock and grab onto the form/mannikin. (We usually use form glue around the mouth also - some taxidermists swear that the entire form needs to be glued; I have found that we don't have enough time to move the skin around on the form to where it should be BEFORE the glue starts drying and locking the skin down.) We always glue the mouth area though. It is a place that the skin could separate.
(Above Picture)
PIC. OF
OPEN MOUTH
ELK WITH PINS STICKING OUT OPEN MOUTH MOUNT.
(Pic. to come yet)
12.
The GAP SPACE between the gum line skin on the cape and the the artificial jaws needs to be filled in with a substance giving the smooth transition from the gum line into the mouth to where the jaws start. (To replace the flesh between gum line and the jaws.) We have played with a lot of substances for this filler material throughout the years and have found the most wonderful product from Research Mannikins that doesn't crack when drying and is plyable for a few hours after the resin and hardener are kneaded together. It fills the tinniest cracks and can be used for the entire gap smoothing out with water and a small brush to a perfection!
(Above Picture)
PICTURE OF
OPEN MOUTH
ELK SCULPTING IN THE LIP GAP.
(Picture to come yet)
BACK ON MOUNTING PROCEDURE...
Back
Next
